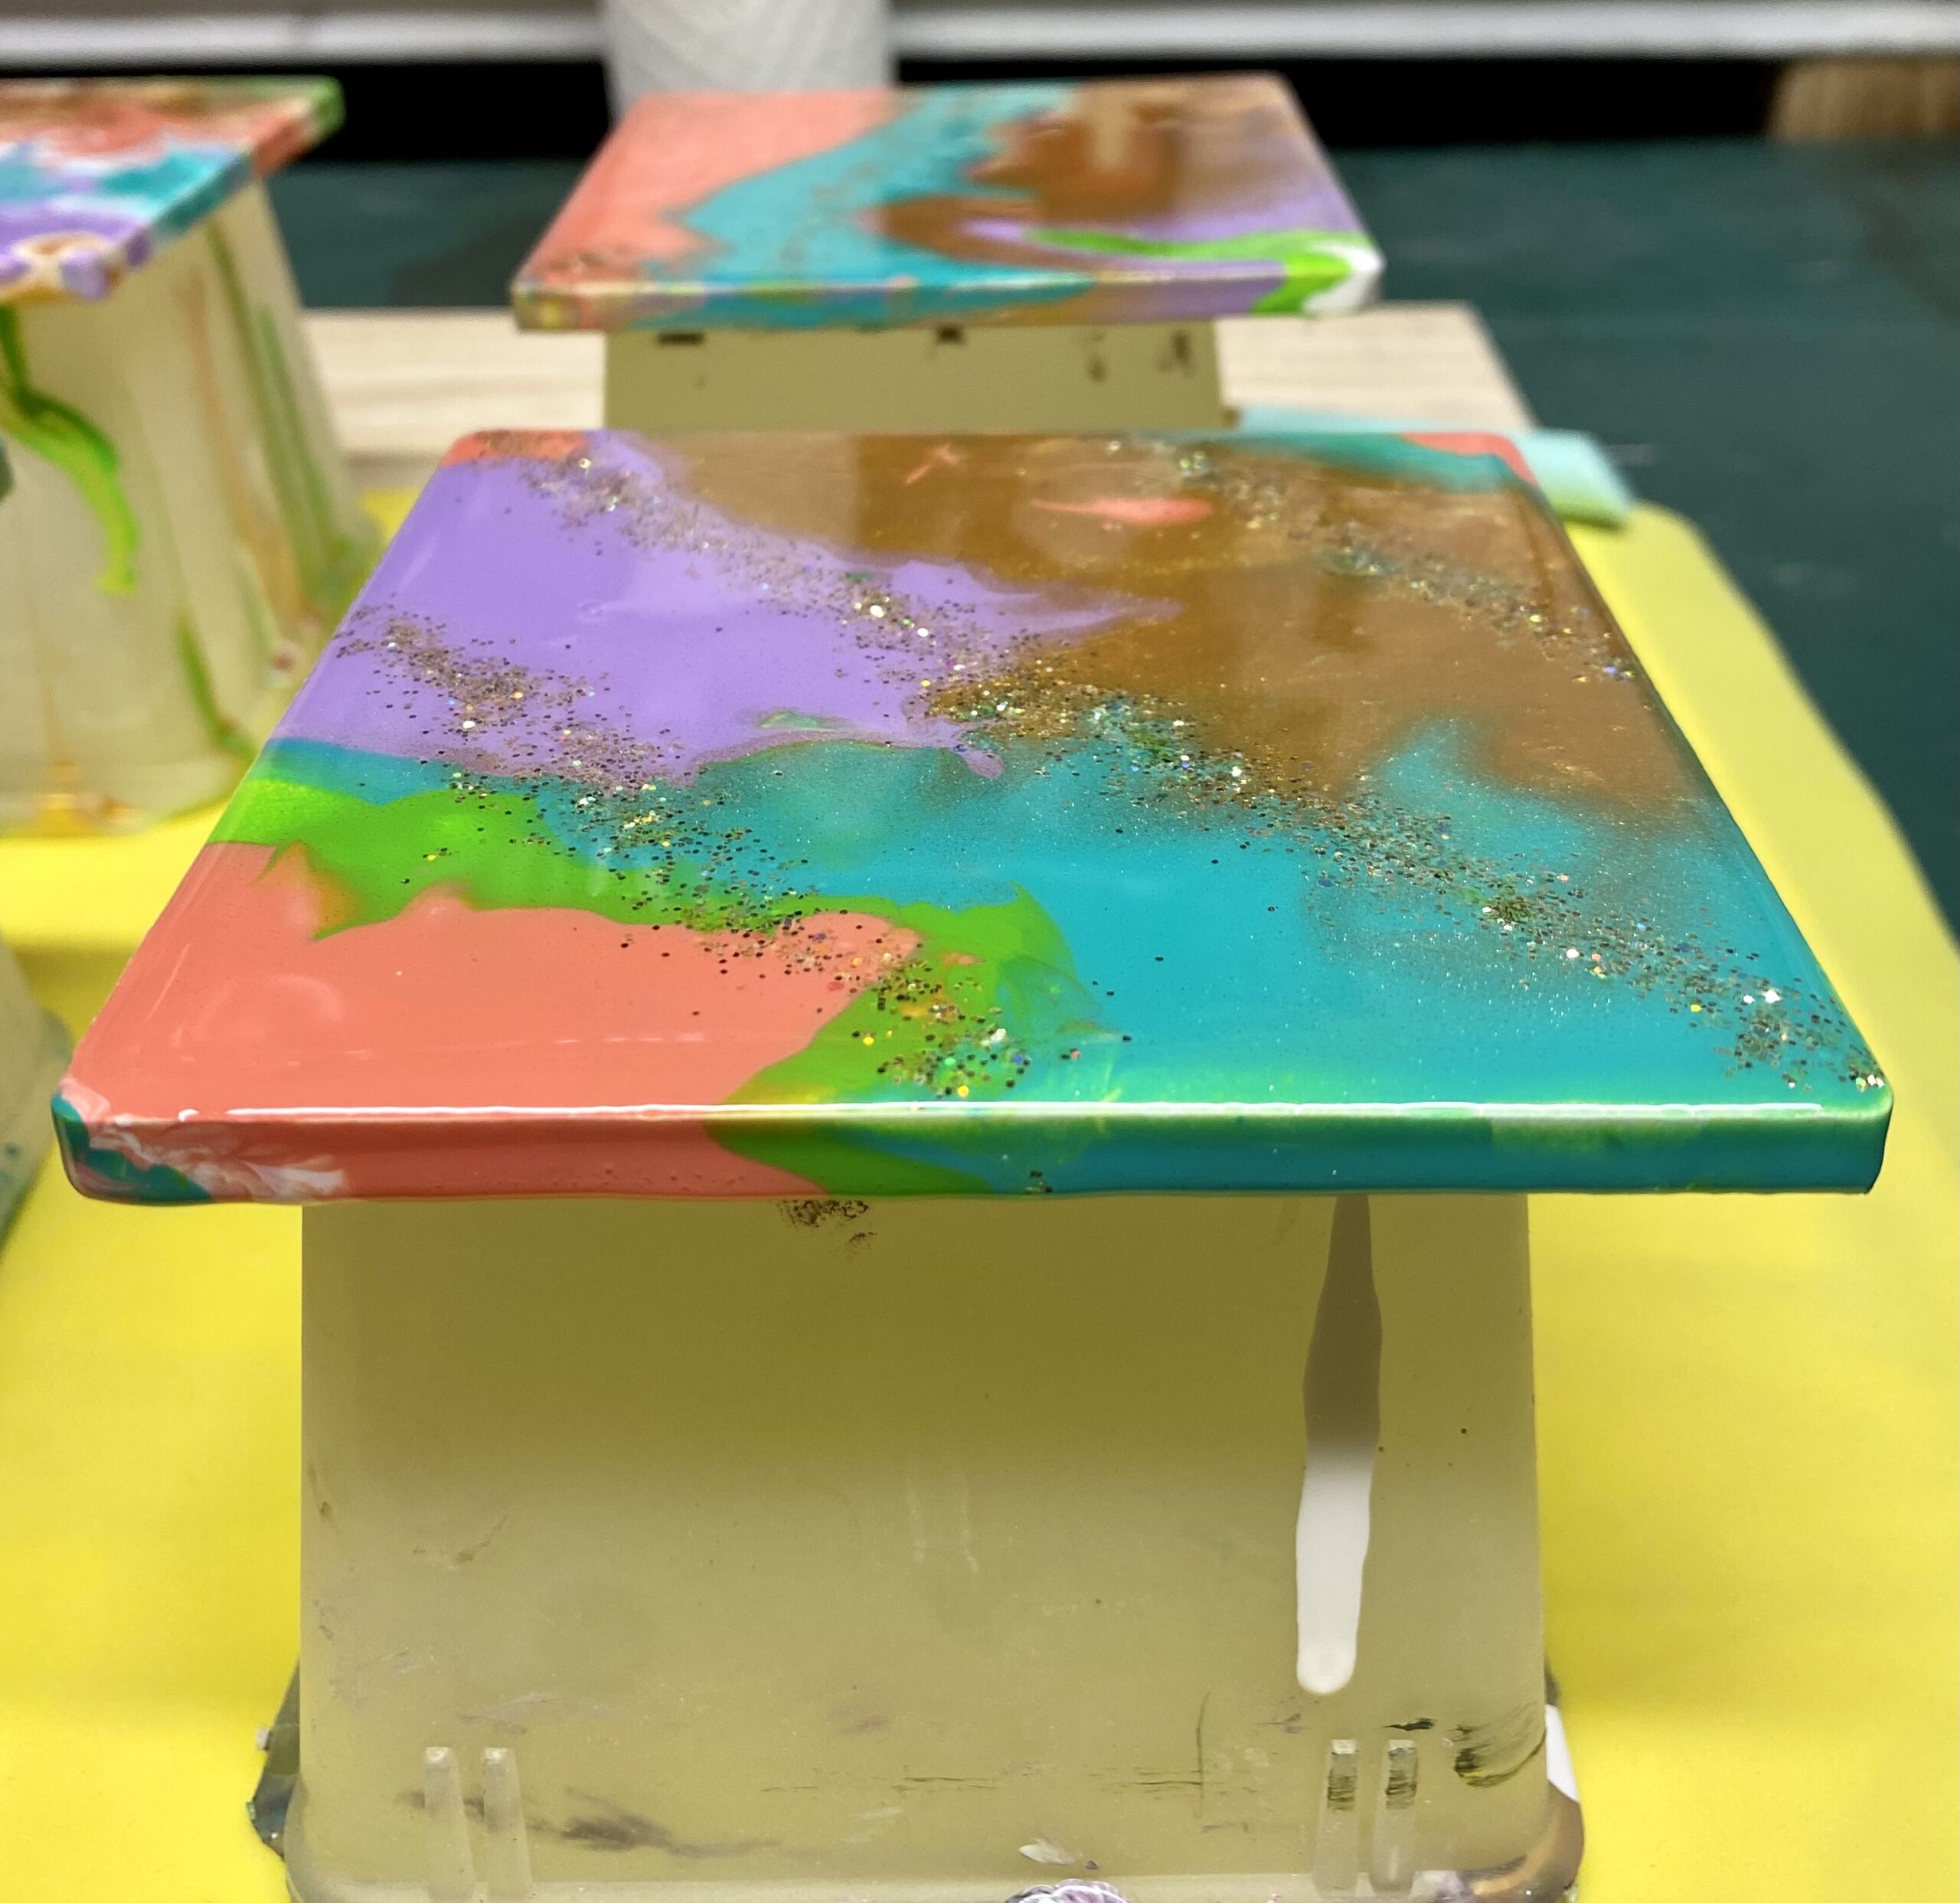
DIY Colorful Acrylic Coasters for Your Home
Are you tired of boring, plain coasters ruining the aesthetic of your beautiful home? Worse yet, do you dread seeing water rings from cold drinks damaging your precious wooden furniture? Don’t let these common nuisances spoil your decor and mood. Instead, elevate your living space with DIY Colorful Acrylic Coasters for Your Home. This easy and fun project not only protects your furniture but also allows you to express your creativity. Let’s dive into the step-by-step process of creating these unique, eye-catching coasters that will impress every guest and add a vibrant touch to your home.
Preparation and Materials for Unique Coasters
Purchasing Coaster Kits and Accessories
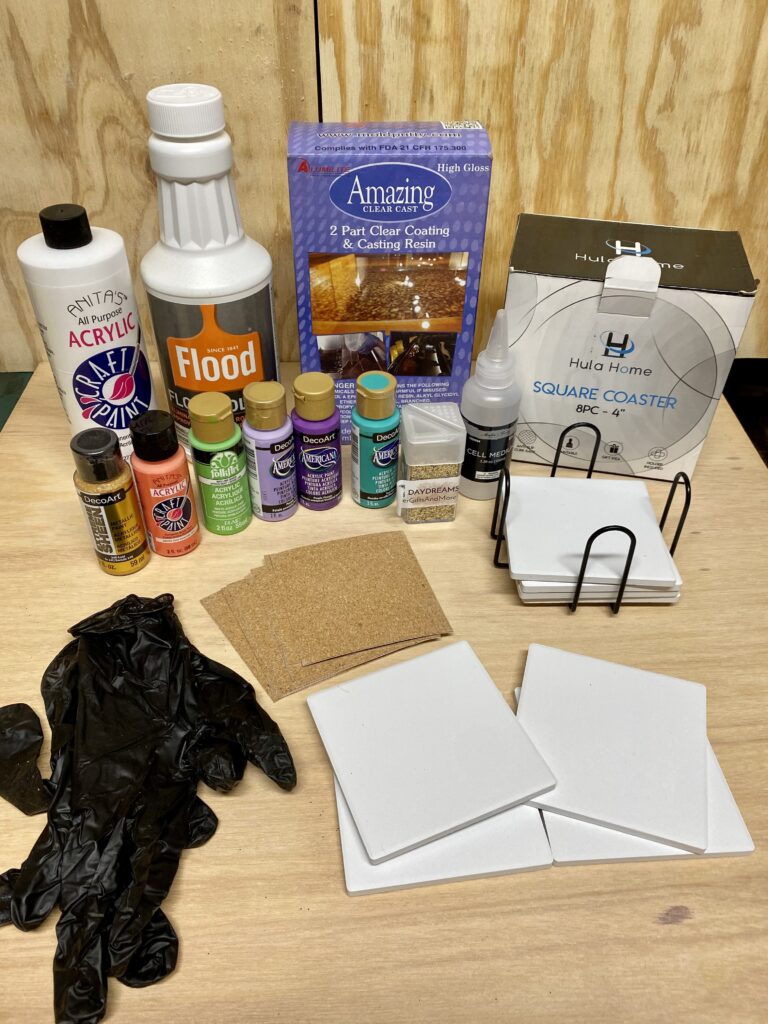
To start your project of creating colorful coasters, the first step is to prepare a coaster kit and the necessary materials. You can easily purchase ceramic coaster kits at craft supply stores or on e-commerce platforms like Amazon. The coaster kit I chose from Amazon includes 8 coasters, a holder for storage, and cork backing for the base.
Selecting Acrylic Paint Colors
The colors of the acrylic paint play a crucial role in the beauty of the coasters. I chose various acrylic paints from different brands: Anita’s Craft Paint in Coral Cove and White, Anita’s Extreme Sheen Metallic in 24K Gold, DecoArt in Purple Pizzazz, Purple Petal, and Teal Mint, along with FolkArt in Lime Green.
Pouring Medium and Silicone Oil
To pour paint smoothly onto the coasters’ surface, a pouring medium is needed. I used Floetrol as the pouring medium, which helps the paint flow more easily. Additionally, silicone oil was used to create cells in the paint, adding unique visual effects on the coaster surface.
Supporting Accessories
For the paint pouring process, some supporting accessories are necessary, such as disposable gloves to protect your hands, popsicle sticks for stirring the paint, and a silicone brush for applying epoxy after the paint dries. Plastic cups for mixing paint and plastic stands purchased from Dollar Tree are also essential to ensure the paint does not spill over during the process. Lastly, painter’s tape is used to cover the bottom of the coasters, keeping the cork backing paint-free during pouring.
Mixing and Preparing Acrylic Paint
Paint and Medium Ratio
Mixing acrylic paint with the pouring medium is crucial to achieve the right consistency for pouring. A popular ratio is 1:1, meaning one part paint to one part pouring medium. However, you can adjust this ratio as needed, but remember that once an ingredient is added, it cannot be removed, so mix carefully.
Preparing Each Paint Color
Each paint color needs to be mixed separately in different plastic cups. I used about 1 ounce of each color for this project because I wanted to create a painting to match the coasters. However, if you only want to make coasters, you need about ½ ounce of each color. This ensures you have enough paint to cover the surface without waste.
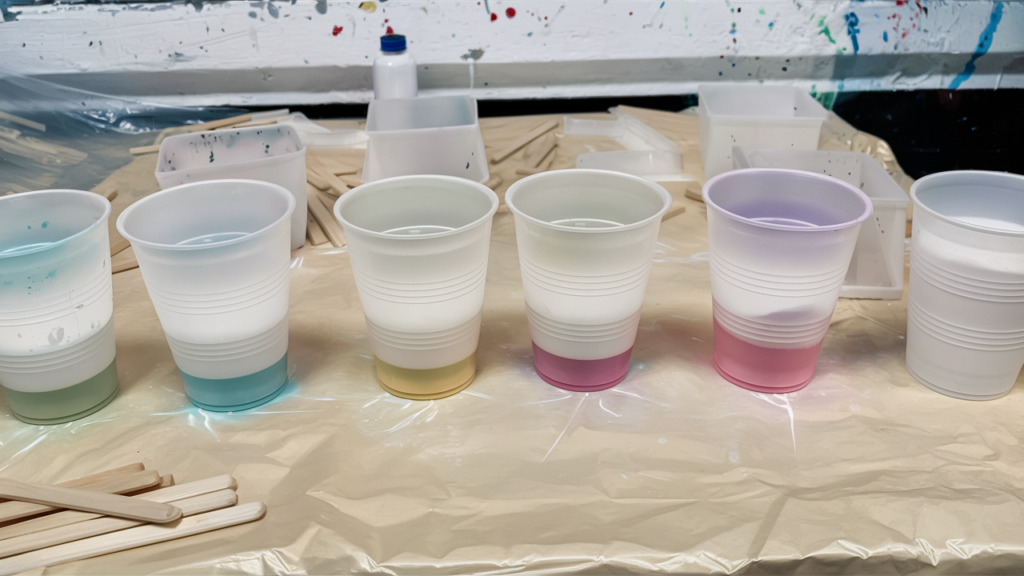
White Paint for Color Movement
In the pouring process, white paint serves as a base color that helps other colors move smoothly. Therefore, you should prepare double the amount of white paint compared to other colors. This helps you control and create smooth effects on the coasters’ surface.
Alternative Pouring Mediums
If you want to save costs or are a beginner, you can make your own pouring medium at home. A cost-effective and efficient option is to mix Elmer’s glue with water in equal parts. This is a good choice for beginners, allowing you to get familiar with the pouring process without significant investment.
With your paint and medium fully prepared, you’re ready to begin the paint pouring phase to create beautiful and unique coasters. In the next section, we will explore different paint pouring methods to unleash your creativity.
Creative Paint Pouring Methods on Coasters
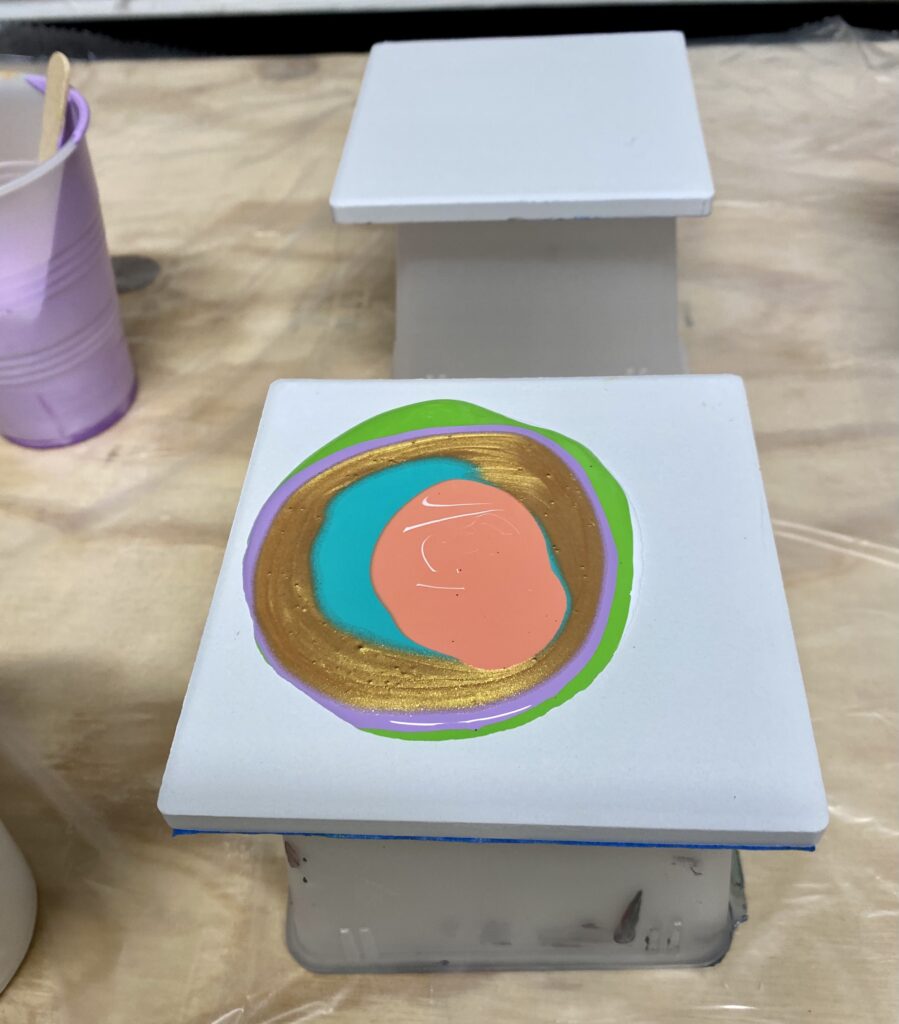
Puddle Pour Method
One interesting paint pouring method is the puddle pour. This involves pouring each color in puddles on top of each other, starting with white. Then, move the coaster back and forth in your hand so the colors spread and cover the surface and edges. This creates unique and captivating patterns.
Blow Painting Method
Blow painting is another way to create fascinating effects. Place the colors next to each other in stripes on the coaster surface, then use a straw to blow the paint into each other, creating random beautiful images. Only move the coaster to complete the design when the colors have blended harmoniously.
Freeform Pouring Method
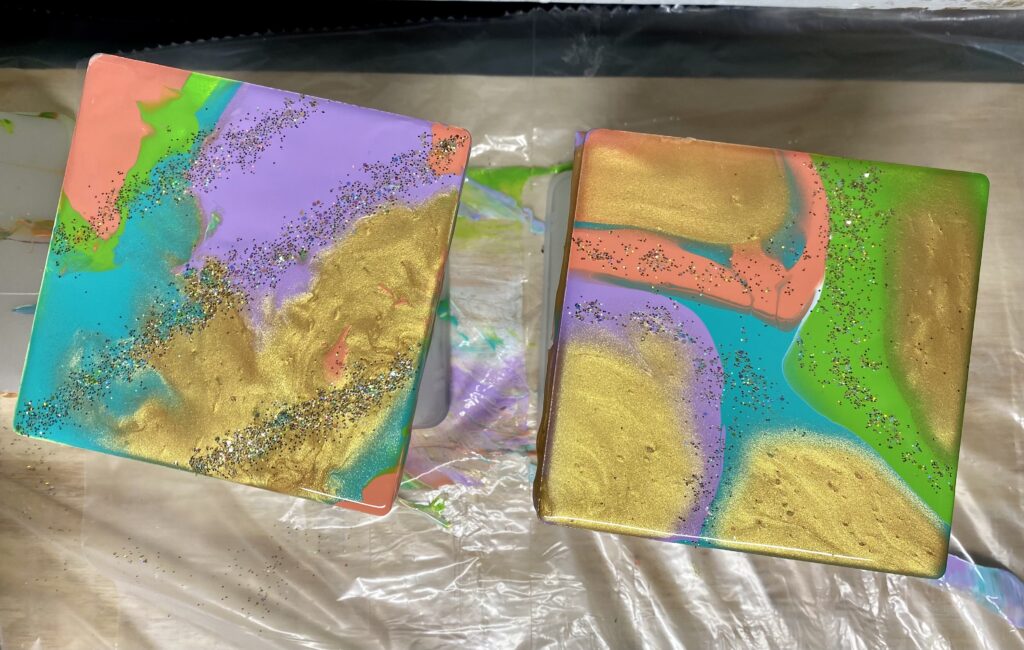
Sometimes, freeform pouring yields surprising and beautiful results. Start by pouring a layer of white paint around the coaster surface, then drop other colors into the corners. As you move the coaster, the colors will spread and blend, creating a pattern unlike any other coaster.
Adding Highlights with Gold Leaf
If you want to add a highlight to your coasters, gold leaf is a fantastic choice. After completing the paint pouring, sprinkle a little gold leaf onto the wet paint surface. This not only adds interesting texture but also makes your coasters shine and stand out.
These methods not only allow you to unleash your creativity but also create unique coasters, each with its own distinctive mark. Now, after completing the paint pouring and letting the colors dry, we will move on to the final stage of finishing and preserving the coasters.
Finishing and Preserving Coasters
Preparing Epoxy
To protect the coaster surfaces and keep the colors lasting, sealing with epoxy is crucial. Follow the instructions on the epoxy package and stir slowly to minimize air bubbles. Once the epoxy is mixed, use a heat gun to pop any large bubbles created during stirring.
Applying Epoxy
After preparing the epoxy, apply it to the coasters. Put on a new pair of disposable gloves and use a silicone brush to spread the epoxy evenly across the coaster surface. After covering the entire surface with epoxy, use your gloved hand to smooth the surface and edges. Repeat this process for all the coasters and place them back on the stands to dry.
Drying the Epoxy
Letting the epoxy dry takes at least 12 hours to ensure a durable coating. During this time, make sure the coasters are placed in a cool, dust-free area. Use the heat gun once more to break any remaining small air bubbles on the surface.
Attaching Cork Backing
When the epoxy is fully dried, the final step is to attach the cork backing to the bottom of the coasters. This cork backing not only helps the coaster stay in place on the table but also protects the table from scratches. Now, your coasters are ready to use or give as gifts.
Creating these colorful coasters brings joy and results in beautiful, practical handmade products. With a little creativity and patience, you can turn simple items into true works of art.

A Creative and Inspiring Conclusion
Creating DIY Colorful Acrylic Coasters for Your Home is a delightful and rewarding project. By following the steps outlined in this guide, you can transform simple materials into stunning and functional pieces of art that protect your furniture while showcasing your creativity. From selecting vibrant acrylic paints and the right pouring medium to mastering various pouring techniques and finishing with epoxy, each step is designed to ensure your coasters are unique and durable. Embrace this opportunity to personalize your home decor and impress your guests with your artistic flair. Start your DIY journey today and enjoy the vibrant, customized touch these coasters bring to your home.
———————————————————————–


Leave a Reply
You must be logged in to post a comment.